

Customization
Customizing your GUI Controls
Functional Controls are necessary for your game, and the appearance of those controls is very important for the aesthetics of your game. In UnityGUI, you can fine-tune the appearance of your Controls with many details. Control appearances are dictated with GUIStyles. By default, when you create a Control without defining a GUIStyle, Unity's default GUIStyle is applied. This style is internal in Unity and can be used in published games for quick prototyping, or if you choose not to stylize your Controls.
When you have a large number of different GUIStyles to work with, you can define them all within a single GUISkin. A GUISkin is no more than a collection of GUIStyles.
How Styles change the look of your GUI Controls
GUIStyles are designed to mimic Cascading Style Sheets (CSS) for web browsers. Many different CSS methodologies have been adapted, including differentiation of individual state properties for styling, and separation between the content and the appearance.
Where the Control defines the content, the Style defines the appearance. This allows you to create combinations like a functional Toggle which looks like a normal Button.
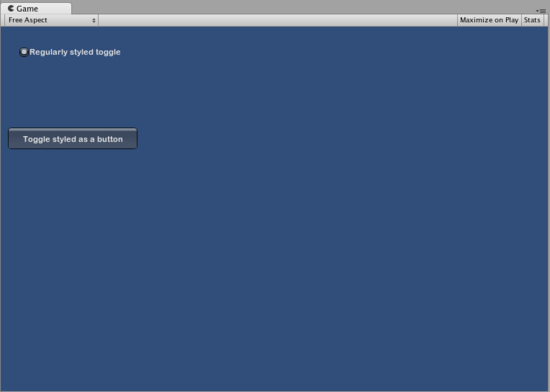
Two Toggle Controls styled differently
The difference between Skins and Styles
As stated earlier, GUISkins are a collection of GUIStyles. Styles define the appearance of a GUI Control. You do not have to use a Skin if you want to use a Style.
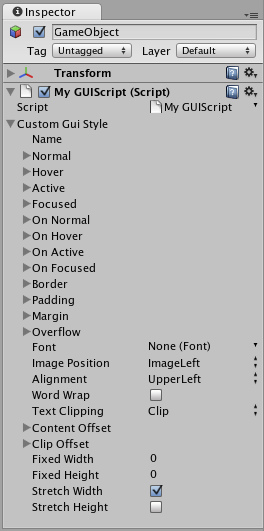
A single GUIStyle shown in the Inspector
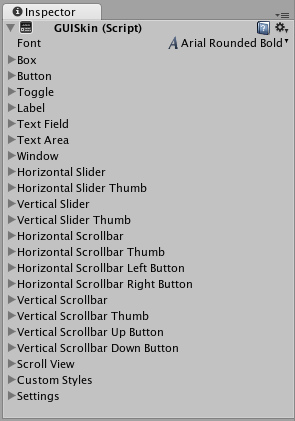
A single GUISkin shown in the Inspector - observe that it contains multiple GUIStyles
Working with Styles
All GUI Control functions have an optional last parameter: the GUIStyle to use for displaying the Control. If this is omitted, Unity's default GUIStyle will be used. This works internally by applying the name of the control type as a string, so GUI.Button() uses the "button" style, GUI.Toggle() uses the "toggle" style, etc. You can override the default GUIStyle for a control by specifying it as the last parameter.
/* Override the default Control Style with a different style in the UnityGUI default Styles */

function OnGUI () {
	// Make a label that uses the "box" GUIStyle.
	GUI.Label (Rect (0,0,200,100), "Hi - I'm a label looking like a box", "box");

	// Make a button that uses the "toggle" GUIStyle
	GUI.Button (Rect (10,140,180,20), "This is a button", "toggle");
}
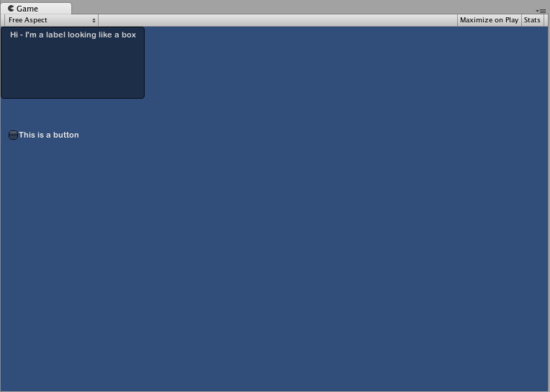
The controls created by the code example above
Making a public variable GUIStyle
When you declare a public GUIStyle variable, all elements of the Style will show up in the Inspector. You can edit all of the different values there.
/* Overriding the default Control Style with one you've defined yourself */

var customButton : GUIStyle;

function OnGUI () {
	// Make a button. We pass in the GUIStyle defined above as the style to use
	GUI.Button (Rect (10,10,150,20), "I am a Custom Button", customButton);
}
Changing the different style elements
When you have declared a GUIStyle, you can modify that style in the Inspector. There are a great number of States you can define, and apply to any type of Control.
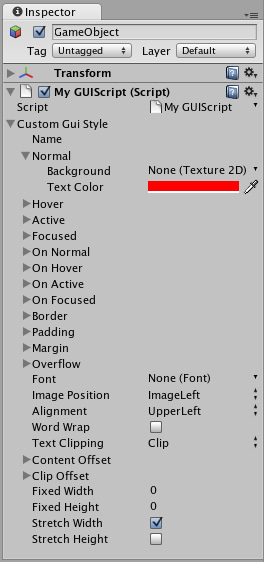
Styles are modified on a per-script, per-GameObject basis
Any Control State must be assigned a Background Color before the specified Text Color will be applied.
For more information about individual GUIStyles, please read the GUIStyle Component Reference page.
Working with Skins
For more complicated GUI systems, it makes sense to keep a collection of styles in one place. This is what a GUISkin does. A GUISkin contains multiple different Styles, essentially providing a complete face-lift to all GUI Controls.
Creating a new GUISkin
To create a GUISkin, select from the menu bar. This will create a GUI Skin in your Project Folder. Select it to see all GUIStyles defined by the Skin in the Inspector.
Applying the skin to a GUI
To use a skin you've created, assign it to GUI.skin in your OnGUI() function.
/* Make a property containing a reference to the skin you want to use */

var mySkin : GUISkin;

function OnGUI () {
	// Assign the skin to be the one currently used.
	GUI.skin = mySkin;

	// Make a button. This will get the default "button" style from the skin assigned to mySkin.
	GUI.Button (Rect (10,10,150,20), "Skinned Button");
}
You can switch skins as much as you like throughout a single OnGUI() call.
/* Example of switching skins in the same OnGUI() call */

var mySkin : GUISkin;

var toggle = true;

function OnGUI () {
	// Assign the skin to be the one currently used.
	GUI.skin = mySkin;

	// Make a toggle. This will get the "button" style from the skin assigned to mySkin.
	toggle = GUI.Toggle (Rect (10,10,150,20), toggle, "Skinned Button", "button");

	// Assign the currently skin to be Unity's default.
	GUI.skin = null;

	// Make a button. This will get the default "button" style from the built-in skin.
	GUI.Button (Rect (10,35,150,20), "Built-in Button");
}
Page last updated: 2007-10-05