

FBX export guide
Unity supports FBX files which can be generated from many popular 3D applications. Use this guideline to help ensure the most reliable results.
Select > Prepare > Check Settings > Use 2011.3 > Verify > Import
What do you want to export? - be aware of export scope e.g. meshes, cameras, lights, animation rigs, etc.
Applications often let you export selected objects or a whole scene
Make sure you are exporting only the objects you want to use from your scene by either exporting selected, or removing unwanted data from your scene.
Good working practice often means keeping a working file with all lights, guides, control rigs etc. but only export the data you need with export selected an export preset or even a custom scene exporter.
What do you need to include? - prepare your assets
- Meshes - Remove construction history, convert to polygons and triangulate or quadrangulate if necessary
- Animation - select the correct rig, check frame rate, animation length etc.
- Textures - make sure your textures live in your unity project or within a folder \textures
- Smoothing - check if you want smoothing groups and/or smooth mesh
How do I include those elements? - check the FBX export settings
Be aware of your settings in the export dialogue so that you know what to expect and can match up the fbx settings In Unity
Which version of FBX are you using? if in doubt use 2011.3
Autodesk update their FBX installer regularly and it can provide different results with different versions of their own software and other 3rd party 3D apps.
See Advanced Options > FBX file format
Will it work? - Verify your export
- Check your file size - do a sanity check on the file size (e.g. >10kb?)
- Re-import your FBX into a new scene in the 3D package you use to generate it - is it what you expected?
Import!
- Import into Unity
- Check FBX import settings in inspector : texures, animations, smoothing, etc.
See below for Maya FBX dialogue example:
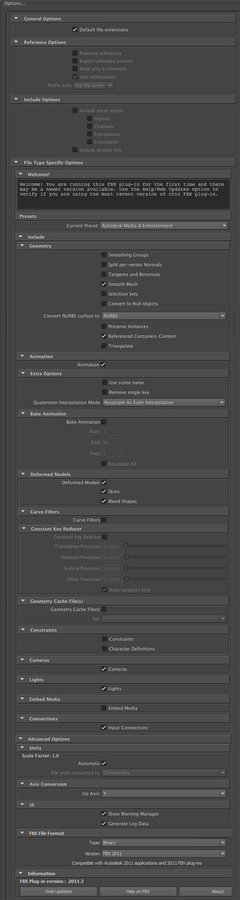 \\
\\