2D or 3D Projects
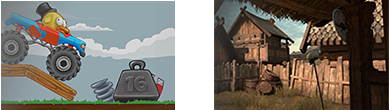
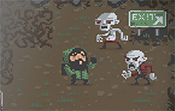
A 3D game’s space has width, height, and depth (known as “planes X, Y, and Z”, respectively), while a 2D game’s space has only width and height (“planes X and Y”, respectively).
When you create a project in Unity, you can decide whether it is 2D or 3D mode. The mode determines some settings for the Unity Editor. These settings are are listed below in 2D vs 3D Mode Settings.
You can swap between 2D or 3D mode at any time, regardless of the mode you set when you created your project. See Switching Between 3D and 2D Modes below. Some projects use both 2D and 3D elements and are sometimes known as “2.5D”.
This manual is a guide to creating projects in 3D and 2D but has some specific pages for 2D project development. See Useful 2D Project Information below.
Switching Between 3D and 2D Modes
To change modes between 2D or 3D mode:
- Bring up to the Editor Settings Inspector, via the Edit>Project Settings>Editor menu.
- Then set Default Behavior Mode to either 2D or 3D.
You can find out more about the Editor Settings Inspector on the Editor Settings page.

Useful 2D Project Information
Whichever type of project you are working in, 2D or 3D, there are some useful pages to help you get started. There are also specific pages for 2D features.
Getting Started with Unity
2D Overview
2D Graphics
2D Physics
- Physics - An introduction to 2D and 3D physics in Unity.
- Rididbody 2D - Placing a game object under control of the physics 2D engine.
2D Joints
- Distance Joint
- Fixed Joint 2D
- Friction Joint 2D
- Hinge Joint 2D
- Relative Joint 2D
- Slider Joint 2D
- Spring Joint 2D
- Target Joint 2D
- Wheel Joint 2D
2D Colliders
2D Physics Material
2D Effectors

2D vs 3D Mode Settings
2D or 3D mode determines some settings for the Unity Editor. These are listed below.
In 2D Project Mode:
- Any images you import are assumed to be 2D images (Sprites) and set to Sprite mode.
- The Sprite Packer is enabled.
- The Scene View is set to 2D.
- The default game objects do not have real time, directional light.
- The camera’s default position is at 0,0,–10. (It is 0,1,–10 in 3D Mode.)
- The camera is set to be Orthographic. (In 3D Mode it is Perspective.)
- In the Lighting Window:
- Skybox is disabled for new scenes.
- Ambient Source is set to Color. (With the color set as a dark grey: RGB: 54, 58, 66.)
- Precomputed Realtime GI is set to off.
- Baked GI is set to off.
- Auto-Building set to off.
In 3D Project Mode:
- Any images you import are NOT assumed to be 2D images (Sprites).
- The Sprite Packer is disabled.
- The Scene View is set to 3D.
- The default game objects have real time, directional light.
- The camera’s default position is at 0,1,–10. (It is 0,0,–10. in 2D Mode.)
- The camera is set to be Perspective. (In 2D Mode it is Orthographic.)
- In the Lighting Window:
- Skybox is the built-in default Skybox Material.
- Ambient Source is set to Skybox.
- Precomputed Realtime GI is set to on.
- Baked GI is set to on.
- Auto-Building is set to on.